Thursday, July 30, 2015

The Alco PA

This is a first for me - two posts on the same day. Now that Seeley Creek is well in hand, I turned my focus back to rolling stock revisiting a project that I started years ago. If you go back to my February 2013 post, you can read about my exploits of trying to create the perfect Alco PA in S scale. Without rehashing my previous post, the short of it is that neither of the two commercially available versions of the PA are even close to accurately representing Alco's famous passenger locomotive. But if you combine the best features from both, a reasonable model can be created. 

This is a photo of the PA after the transformation. It's crude but a far cry better than either of the two as manufactured versions.  The model is attached to an Omnicon PA conversion mechanism (long out of production but available from time to time on Ebay.

After some consultation with my friend Bud Rindfleisch, and perusing literally hundreds of PA photographs from every conceivable angle (as well as one trip to Portland, OR to see the sole surviving PA), we concluded that the AP nose was too angular and needed to be rounded on the corners both vertically and horizontally on the top of the nose.  The other area that needed help was the front cab windows, as they were were too rectangular.  Photos revealed that the top of the windows were gently arched and the lower edge was curved downward.  All of this would require modification.  The American Models skirt between the trucks was also a big problem as it extended vertically down from the car body instead of curving inward. 

The big challenge was rounding the corners of the nose because it meant that a good amount of cast-on detail would have to be removed.  The number boards would have to be removed as well as the front anti-climber and buffer plate. Fortunately for PRR modelers the Pennsy replaced the as-built number boards with their own design angled number boards (though in my case that meant more scratch building).  The anti-climber and buffer plates were not quite right on the AF version anyway, so that meant an opportunity to correct another flaw.

This is a photo of the completed model nearly ready for the paint shop:

You can clearly see the difference with the rounded  corners and the new side skirt between the trucks. In this view you can also see the new Pennsy number boards and anti-climber/buffer plate. You can also make out the other Pennsy specific details such as the air intake grills added to the nose and the train phone antenna system. I added new fairing above and behind the cab side windows and above the front windows as per the prototype.  You may also notice that this is a non-dynamic brake version of the PA. I removed the DB's on the car body roof and replaced them with a smooth sheet of styrene. I have a few more details to fabricate before painting, such as the coupler cut levers above the front corner steps and grab irons above the front windows and other places.  I'm really pleased  with the way this turned out.  Here's a photo of a real PA (though not Pennsy) for comparison:


Seeley Creek Crossing Complete

My last post ended with painting the base for what would become Seeley Creek. Now it's time to add the glossy medium that will represent the water's surface. This view shows the first application the acrylic gloss media to the painted stream bed. The  media dries clear and the blue tint shown in the photo will disappear when the acrylic material is dry.  This is the first of several coats and I quickly learned not to introduce air bubbles into the media.  If that occurs on the first coat, it can be corrected on the second and any subsequent applications.  The acrylic  gloss media is best applied with a small round tipped paint brush.  I like using this stuff because it dries clear, has no odor, and clean up is simple with just soap and water.  When dry the surface texture is very glossy and has gentle ripples in it that nicely represents flowing water.  Since I model the Fall, most streams are in low flow conditions, so I didn't need to introduce any rapids or "white water" conditions.

The next step in the process was to extend the tree line down the hillside in the background and  blend it with the photos in the backdrop.  I began by painting a tree line on the backdrop along the ridge line of the hillside with dark brown paint.  It's not important that the painted area look like trees, because it will be covered by foliage.  It's there so that the light backdrop doesn't show through the understory of the forest.

I also used a foliage color palette that was consistent with the trees that were in the photo backdrop, and placed smaller trees in the back and larger ones in the front to create the effect of distance.

Here's a close-up of the trees showing a variety of foliage type.  The edge of the forest includes smaller bushes and vegetation to fill the gap between the ground cover and the tree canopies. (More on my tree making process in an upcoming post) The green florist foam that formed the base of the hillside made for easy planting of the trees. I use an awl to make a tiny hole, and then push the base of the tree into it. That's all there is to it. This view also shows the ground up leaves that form the base of the forest.  In retrospect, I probably only needed the ground up leaves in the foreground of the forest and not over the entire hillside.

This view shows the tree line extending down the hillside.  Note the smaller trees to the left and larger, closer trees to the right.  Also note how the brown painted ridge line disappeared, but allows no blue sky to project through the tress.

In this view the tree line extends all of the way to the water's edge and opens up just enough to show the field in the photo backdrop.  I added some static grass on the right which will extend under the right bridge abutment.  I still have more trees to plant on the hillside, but wanted to complete the area behind where there bridge will go as the rest of the scenery can placed once the bridge is set.

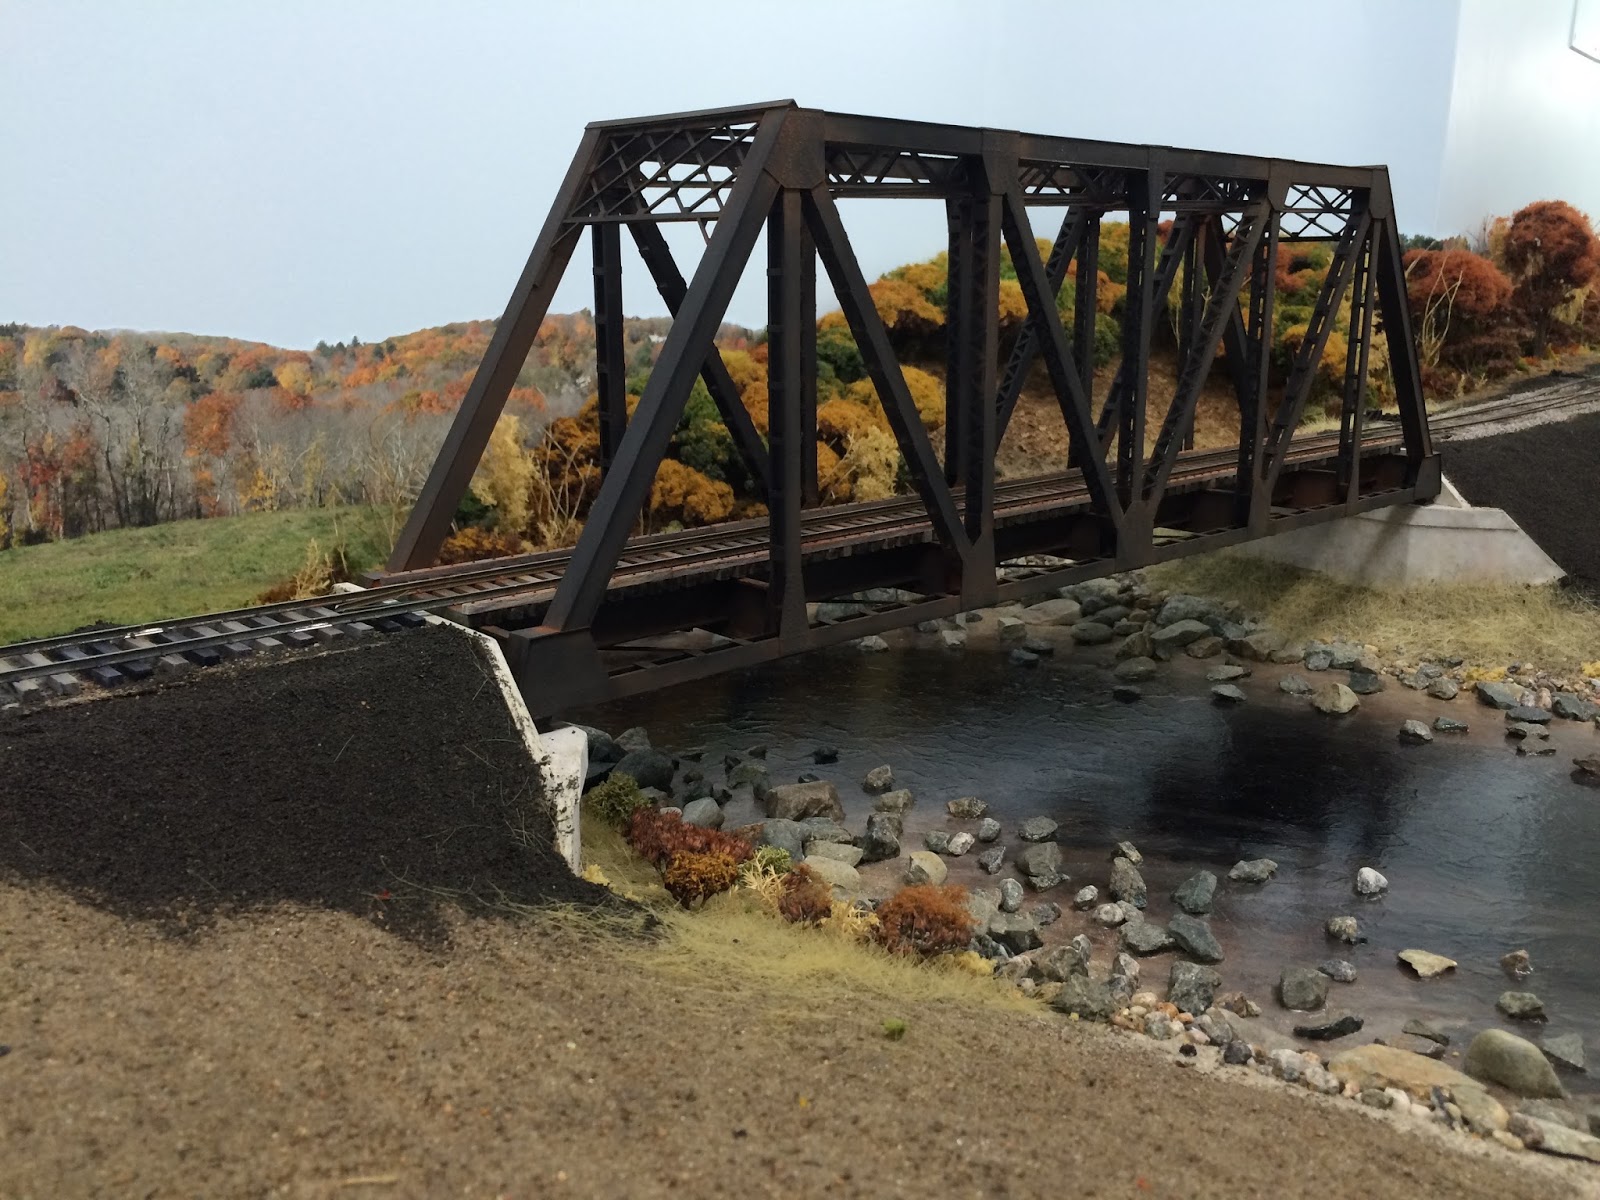
I then set the bridge on its abutments and shimmed the bridge bearings until the deck was level and at the proper elevation.  I connected the track to the adjacent ties but otherwise did not secure the bridge in case it ever had to be removed. The fill slopes on the approaches were covered with cinder like material and static grass was applied under the bridge.  Work on the foreground details has begun under the near abutment and much work is still needed to complete the scene, but for now the bridge is serviceable.

This is my favorite shot of the completed scene taken from under the bridge.  It appears as if the stream continues on, but in realty it ends a short distance away.


Thursday, July 9, 2015

Back to the Bridge

I've really been pushing myself to complete the truss bridge especially now that the stream bed and surrounding scenery is taking shape. Both trusses are now complete and attached to the bridge deck. I was pleased with how well the painting of the lattice work turned out.  I was concerned that the interior portion of the lattice beams would be the color of the white Evergreen styrene, but that wasn't the case at all.  I was able to angle the tip of my airbrush sufficiently to paint mostly all of the interior space.  A few hard to get places will need some touch up with a brush, but overall I was pleased.

With the trusses installed it has become quite an impressive structure and incredibly strong. I don't think there'll be an deflection to worry about and all of the joints appear to have bonded well.

It still has a bit more work especially on the upper sway bracing. Fortunately Plastruct makes a diagonally braced styrene joist that is the proper dimension for the sway bracing.  That being said, it'll still be a challenge because the they not only extend perpendicular to the panel points, but diagonally in an X pattern between them.

Nonetheless, I'm pleased with the progress and it looks rather different than it did a few months back.  Here's a photo from my September 11th blog post.  I never thought that it would ever progress this far considering all of the exhaustive scratch building.

Wednesday, July 8, 2015

Detailing Seeley Creek

With the Seeley Creek bridge nearing completion, I now need to focus on completing the stream bed beneath were the structure will ultimately be placed.  The stream bed started out as a flat piece of Masonite and now it's time to make it look like flowing water.  The first step is to paint the bottom so that it will look like a stream.  For this I used acrylic paint and started with lighter shades of tan and gray near the shoreline and gradually added darker color until it became pure black near the center of the creek.  Ultimately, I'll simulate flowing water by coating the painted stream bed with acrylic gloss matte medium.  That's still a ways off as I have to line the banks with rocks and finish adding the ground texture on the adjoining slopes.

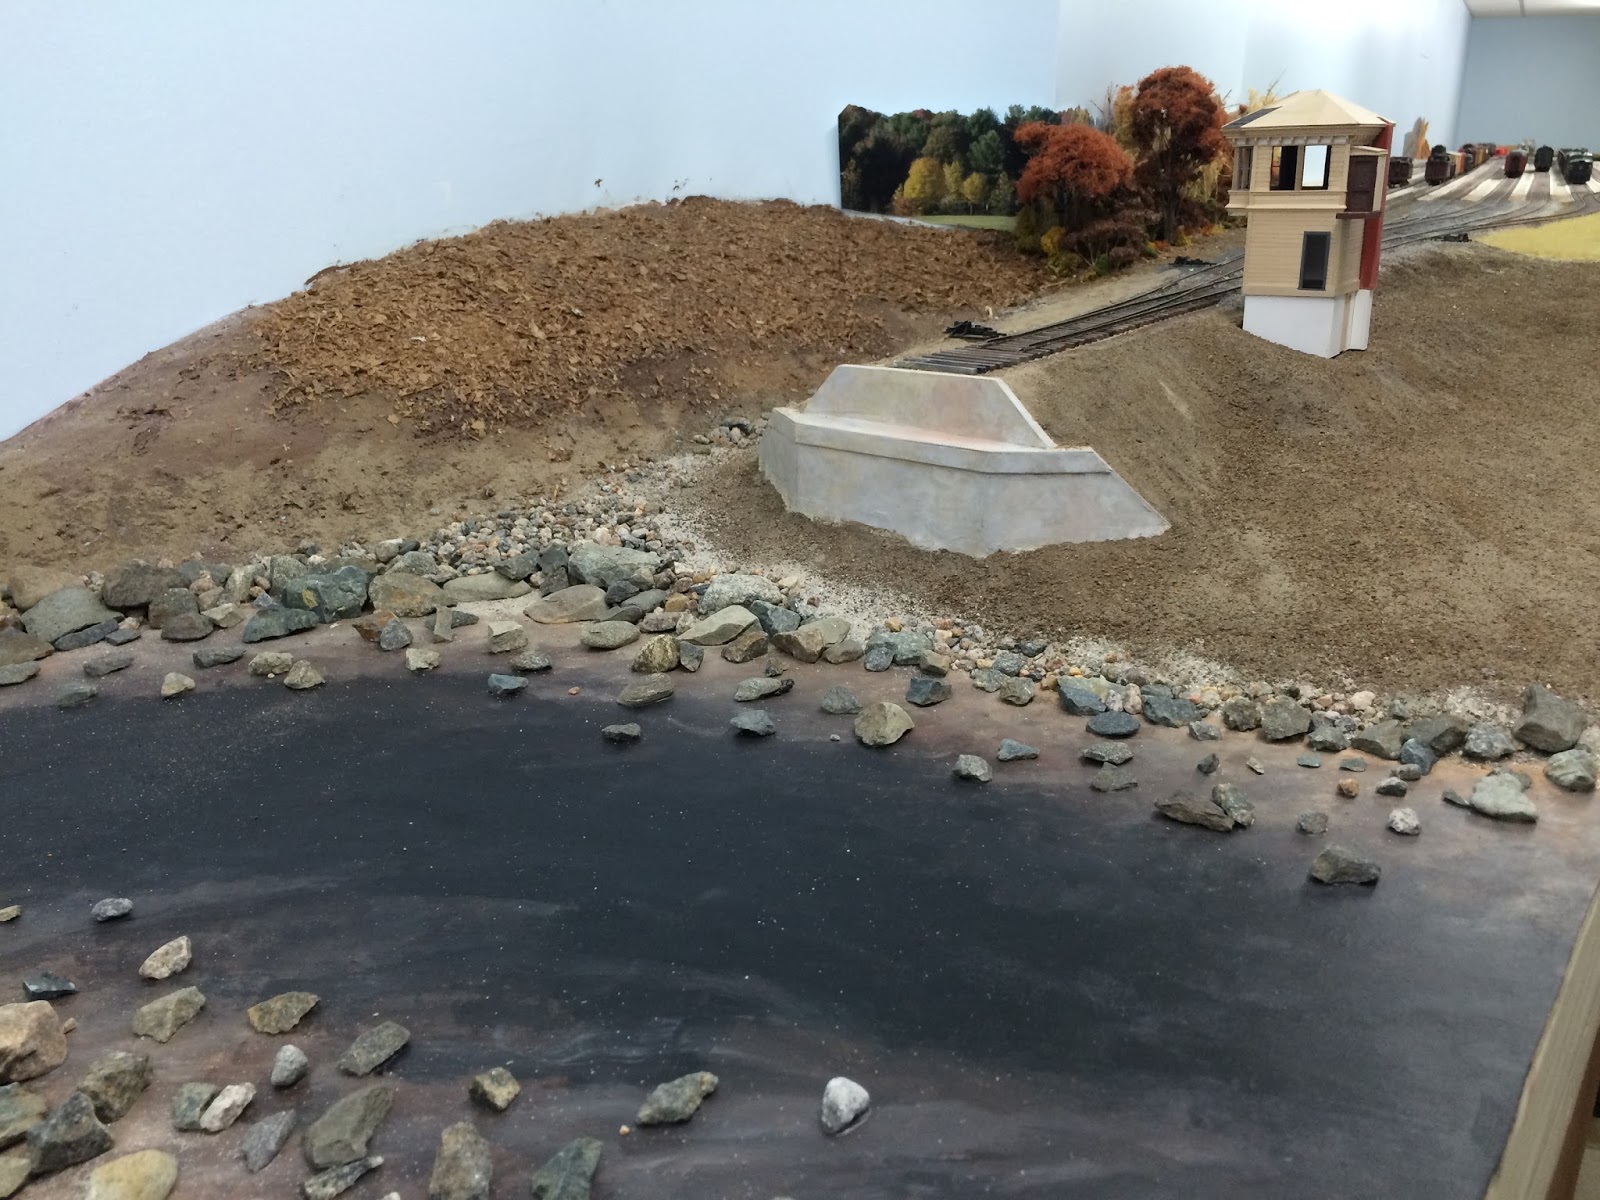
Here's a photo of the painted stream bed.  The lighter lines flowing into the dark area represent a bit of turbidity form water flowing around rocks and across the shallower parts of the stream.  Also in this view you can see both abutments of the truss bridge.  The abutments are made from mat board and 1/32" plywood covering the wood risers that are part of the original benchwork.

The stream bank needs more rocks...a lot more!  Much of the geology in this area is made up of glacial till.  Huge rocks that were moved thousands of years ago during the ice age and deposited  along stream beds or areas there were eventually  eroded by streams.

This photo shows the completed rock lined stream bed.  The rocks simply came from my backyard. I tried to select stones that were flat on one side and glued them randomly to the painted Masonite. I used smaller stones and fine beach sand behind the larger stones as a transition to the embankments on the bridge approaches. Once all the stones are secure, I'll brush on the gloss acrylic medium to represent the water.

I can't take credit for the process.  It goes way back to the early 1980's and Dave Frary's book - Easy to Build Model Railroad Scenery published by Kalmbach in 1982.  I've used this method on many occasions and the results are quite spectacular.  I personally prefer it to pouring resin to represent water, especially moving water.  We should be able to see the results in my next post.

One more shot of Seeley Creek looking back toward Southport yard. You can see Kendall tower sitting on it's foundation on the approach embankment to the bridge.  Next steps include extending the photo backdrop and planting lots of trees on the far hillside.

Thursday, June 25, 2015

Kendall Tower

Kendall Tower was located just north of the Seeley Creek Bridge.  It controlled all movements through the yard and trains coming off the Erie at Elmira.  The tower was a prominent feature at the south end of Southport yard. It was located on a fill slope, and unfortunately on my layout, the rear of the tower is visible instead of the more ornamental front view.  The tower is a scratch build in any scale as nothing comes close to representing its Victorian era architecture.  I found plans for Kendall on the Elmira Branch Yahoo Group website.  When comparing the plans against the photos of the actual structure, they appear to be quite accurate.  

My version of Kendall began with the base structure using mat board as a sub structure and 1/32" scribed siding.  That was the easy part.  The structure has a significant amount of Victoria era detailing with lots of corbels and ogee moulding, a challenge in any scale but especially in S.  The above photo shows the front of the building with the upper level bay window.  In this view, the roof corbels can be seen.  They extend all around the upper part of the structure .  Mine were scratched from 1/16" basswood.  I used a pattern of the curve cut into a piece of styrene and used that as a guide to carve each corbel by hand.

The above photo shows all of the corbels installed and the second story walls painted a medium brown color prior to building the roof structure.  I cut the roof base from 1/32" thick model aircraft plywood. The notch is for the brick chimney that extends up the rear wall of the building.  You can also make out the small second story rear portico entry where the exterior stairs will eventually lead.  The windows are modified Tichy HO scale injection molded castings with some of the mullions removed.

This will certainly make an unusual and interesting structure on the layout.  Stay tuned for more photos of the roof and upper eave details.

Saturday, June 6, 2015

Back to Working on the Seeley Creek Truss Bridge

After quite some time I returned to working on the bridge over Seeley Creek.  From my earlier post you may recall that the bridge floor system is made entirely of white Evergreen styrene.  This week I painted the floor system black and weathered it with Bragdon weathering powders, and I must admit that it looks rather striking. The photo shows it just before adding the bridge timbers.  I cut the bridge timbers from 5/32" x 5/32" basswood (10" square in S Scale)  the bridge ties were then stained in a solution of India ink and denatured alcohol to give them a nice weathered look.

Next the ties were glued to the bridge deck with Walthers Goo adhesive.  I spaced them 9" apart and every fourth tie or so I used a square to make sure that there were square with the deck. I then used a notched file card to gauge the overhang distance from the deck beams.

I also used a 7" x 9" switch tie as a spacer to gauge the distance between ties.


Here's the completed bridge deck.  The blue tape marks the center of the bridge and the location of the base of rail for spiking down the first running rail.

Thursday, May 14, 2015

Static Grass

The next step in the scenery process is to add some grass.  By late Fall most grass has turned golden brown with some grasses still holding on to a bit of green  I chose rather long strands of static grass in yellow and pale green colors to add to the area between the background and the tracks.  I use shorter length (6-8mm) light green grass material and longer strands of yellow (10-12mm).  The effect turned out rater well.  From the above photo you can hardly make out the Chapel Lumber siding.  The grass texture covers the siding track in most places and the ties are barely discernible.

I  built my own static grass applicator from an electronic fly squatter available from Harbor freight tools and an ordinary kitchen strainer.  It's rather easy to do and only costs a few dollars.  Here's a photo of my completed applicator:

I won't go into detail on how to make one, but if you search Youtube for static grass applicators, several instructional videos will show up.  I was overall pleased with the result.  It could be a little more powerful and some folks suggest adding more power than the two D sized batteries that fit the device's handle, but mine worked just fine.  Now time to plant some grass in that foreground field.