I've really been pushing myself to complete the truss bridge especially now that the stream bed and surrounding scenery is taking shape. Both trusses are now complete and attached to the bridge deck. I was pleased with how well the painting of the lattice work turned out. I was concerned that the interior portion of the lattice beams would be the color of the white Evergreen styrene, but that wasn't the case at all. I was able to angle the tip of my airbrush sufficiently to paint mostly all of the interior space. A few hard to get places will need some touch up with a brush, but overall I was pleased.
With the trusses installed it has become quite an impressive structure and incredibly strong. I don't think there'll be an deflection to worry about and all of the joints appear to have bonded well.
It still has a bit more work especially on the upper sway bracing. Fortunately Plastruct makes a diagonally braced styrene joist that is the proper dimension for the sway bracing. That being said, it'll still be a challenge because the they not only extend perpendicular to the panel points, but diagonally in an X pattern between them.
Nonetheless, I'm pleased with the progress and it looks rather different than it did a few months back. Here's a photo from my September 11th blog post. I never thought that it would ever progress this far considering all of the exhaustive scratch building.
Thursday, July 9, 2015
Wednesday, July 8, 2015
Detailing Seeley Creek
With the Seeley Creek bridge nearing completion, I now need to focus on completing the stream bed beneath were the structure will ultimately be placed. The stream bed started out as a flat piece of Masonite and now it's time to make it look like flowing water. The first step is to paint the bottom so that it will look like a stream. For this I used acrylic paint and started with lighter shades of tan and gray near the shoreline and gradually added darker color until it became pure black near the center of the creek. Ultimately, I'll simulate flowing water by coating the painted stream bed with acrylic gloss matte medium. That's still a ways off as I have to line the banks with rocks and finish adding the ground texture on the adjoining slopes.Here's a photo of the painted stream bed. The lighter lines flowing into the dark area represent a bit of turbidity form water flowing around rocks and across the shallower parts of the stream. Also in this view you can see both abutments of the truss bridge. The abutments are made from mat board and 1/32" plywood covering the wood risers that are part of the original benchwork.
The stream bank needs more rocks...a lot more! Much of the geology in this area is made up of glacial till. Huge rocks that were moved thousands of years ago during the ice age and deposited along stream beds or areas there were eventually eroded by streams.
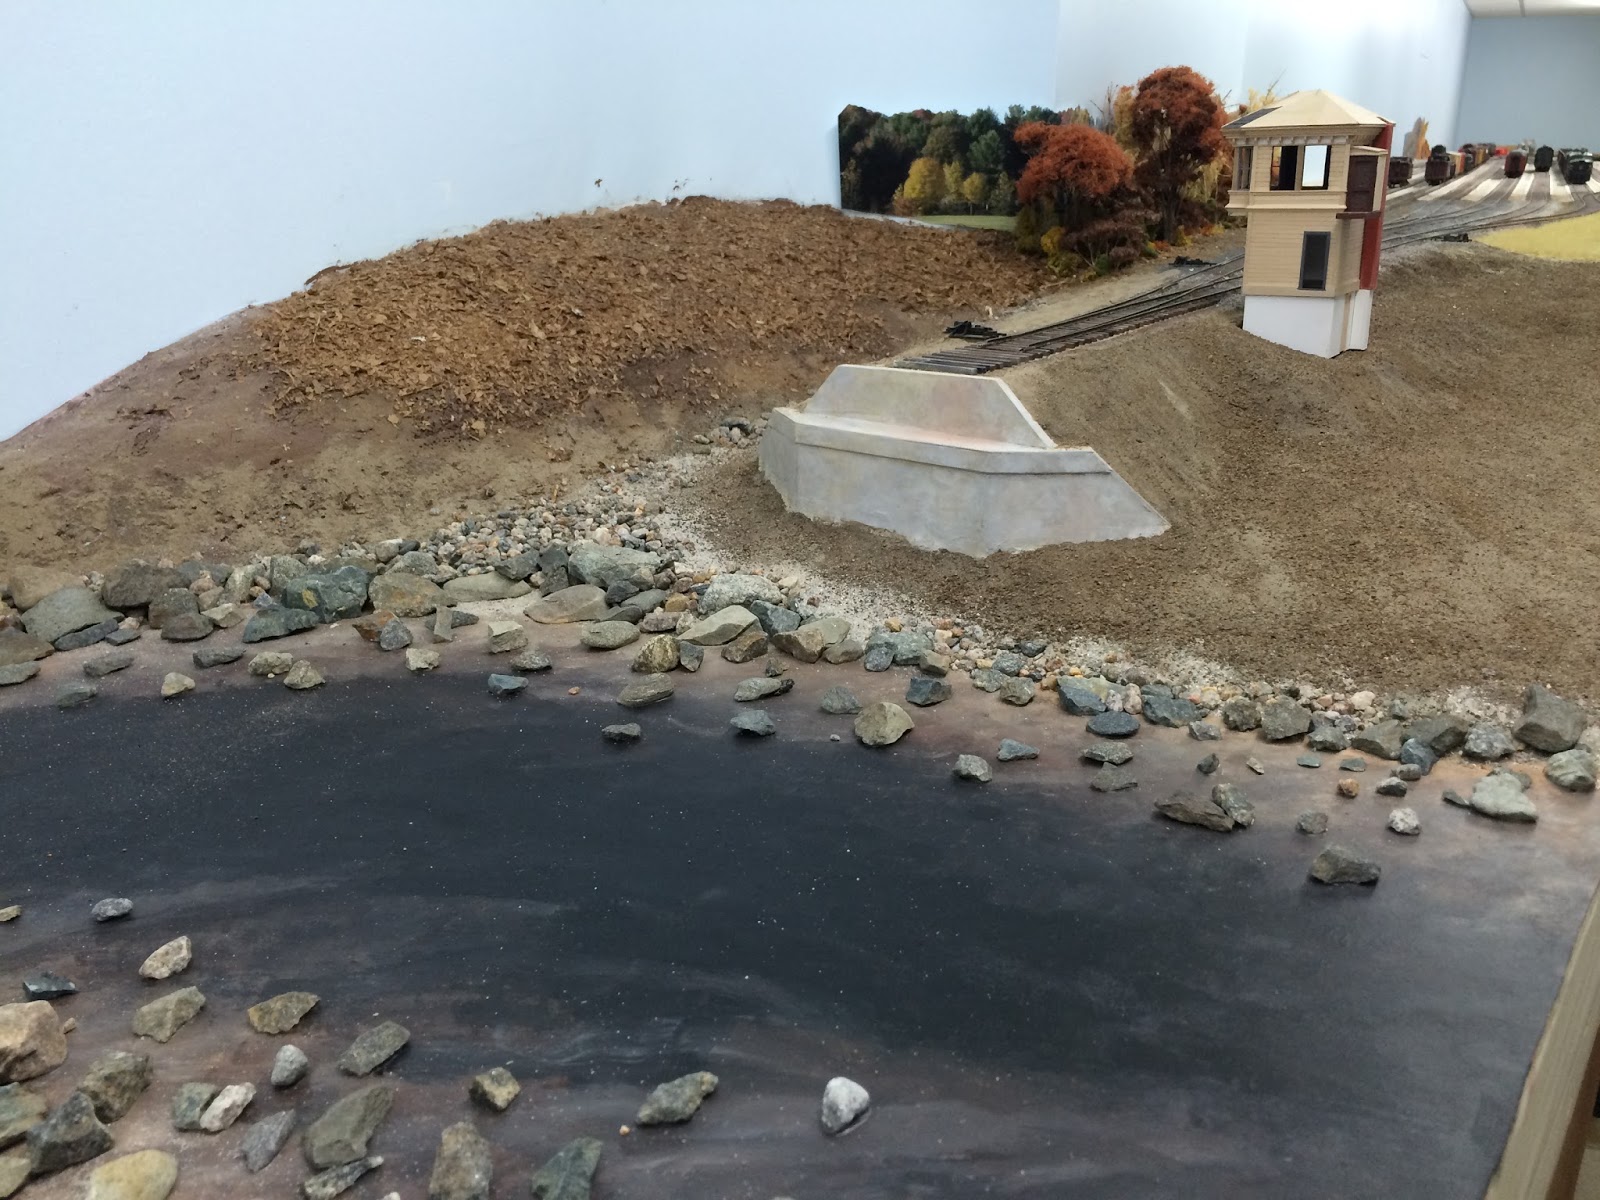
This photo shows the completed rock lined stream bed. The rocks simply came from my backyard. I tried to select stones that were flat on one side and glued them randomly to the painted Masonite. I used smaller stones and fine beach sand behind the larger stones as a transition to the embankments on the bridge approaches. Once all the stones are secure, I'll brush on the gloss acrylic medium to represent the water.
I can't take credit for the process. It goes way back to the early 1980's and Dave Frary's book - Easy to Build Model Railroad Scenery published by Kalmbach in 1982. I've used this method on many occasions and the results are quite spectacular. I personally prefer it to pouring resin to represent water, especially moving water. We should be able to see the results in my next post.
One more shot of Seeley Creek looking back toward Southport yard. You can see Kendall tower sitting on it's foundation on the approach embankment to the bridge. Next steps include extending the photo backdrop and planting lots of trees on the far hillside.
Thursday, June 25, 2015
Kendall Tower
My version of Kendall began with the base structure using mat board as a sub structure and 1/32" scribed siding. That was the easy part. The structure has a significant amount of Victoria era detailing with lots of corbels and ogee moulding, a challenge in any scale but especially in S. The above photo shows the front of the building with the upper level bay window. In this view, the roof corbels can be seen. They extend all around the upper part of the structure . Mine were scratched from 1/16" basswood. I used a pattern of the curve cut into a piece of styrene and used that as a guide to carve each corbel by hand.
The above photo shows all of the corbels installed and the second story walls painted a medium brown color prior to building the roof structure. I cut the roof base from 1/32" thick model aircraft plywood. The notch is for the brick chimney that extends up the rear wall of the building. You can also make out the small second story rear portico entry where the exterior stairs will eventually lead. The windows are modified Tichy HO scale injection molded castings with some of the mullions removed.
This will certainly make an unusual and interesting structure on the layout. Stay tuned for more photos of the roof and upper eave details.
Saturday, June 6, 2015
Back to Working on the Seeley Creek Truss Bridge
After quite some time I returned to working on the bridge over Seeley Creek. From my earlier post you may recall that the bridge floor system is made entirely of white Evergreen styrene. This week I painted the floor system black and weathered it with Bragdon weathering powders, and I must admit that it looks rather striking. The photo shows it just before adding the bridge timbers. I cut the bridge timbers from 5/32" x 5/32" basswood (10" square in S Scale) the bridge ties were then stained in a solution of India ink and denatured alcohol to give them a nice weathered look.
Next the ties were glued to the bridge deck with Walthers Goo adhesive. I spaced them 9" apart and every fourth tie or so I used a square to make sure that there were square with the deck. I then used a notched file card to gauge the overhang distance from the deck beams.
I also used a 7" x 9" switch tie as a spacer to gauge the distance between ties.
Here's the completed bridge deck. The blue tape marks the center of the bridge and the location of the base of rail for spiking down the first running rail.
Next the ties were glued to the bridge deck with Walthers Goo adhesive. I spaced them 9" apart and every fourth tie or so I used a square to make sure that there were square with the deck. I then used a notched file card to gauge the overhang distance from the deck beams.
I also used a 7" x 9" switch tie as a spacer to gauge the distance between ties.
Here's the completed bridge deck. The blue tape marks the center of the bridge and the location of the base of rail for spiking down the first running rail.
Thursday, May 14, 2015
Static Grass
The next step in the scenery process is to add some grass. By late Fall most grass has turned golden brown with some grasses still holding on to a bit of green I chose rather long strands of static grass in yellow and pale green colors to add to the area between the background and the tracks. I use shorter length (6-8mm) light green grass material and longer strands of yellow (10-12mm). The effect turned out rater well. From the above photo you can hardly make out the Chapel Lumber siding. The grass texture covers the siding track in most places and the ties are barely discernible.
I built my own static grass applicator from an electronic fly squatter available from Harbor freight tools and an ordinary kitchen strainer. It's rather easy to do and only costs a few dollars. Here's a photo of my completed applicator:
I won't go into detail on how to make one, but if you search Youtube for static grass applicators, several instructional videos will show up. I was overall pleased with the result. It could be a little more powerful and some folks suggest adding more power than the two D sized batteries that fit the device's handle, but mine worked just fine. Now time to plant some grass in that foreground field.
I built my own static grass applicator from an electronic fly squatter available from Harbor freight tools and an ordinary kitchen strainer. It's rather easy to do and only costs a few dollars. Here's a photo of my completed applicator:
I won't go into detail on how to make one, but if you search Youtube for static grass applicators, several instructional videos will show up. I was overall pleased with the result. It could be a little more powerful and some folks suggest adding more power than the two D sized batteries that fit the device's handle, but mine worked just fine. Now time to plant some grass in that foreground field.
Monday, April 27, 2015
Photoback Drops and Scenery
Here's a view looking the other way. Compare this view with the one from my March 18th post. It's essentially the same view. In the above view you can hardly tell where the reverse curve is along the background wall. The tree cover helps hide the location where the wall juts out.
Here's a close up of the tree cover in front of the backdrop. All of my trees are made from natural plant materials found locally or in my garden. From left to right, the first tree is made from a sea lavender armature covered with stretched fiber foliage material. The bare trees are from a boxwood shrub that had some bad winter damage and lost all its leaves. The low shrubs are dried sedum that turns a reddish brown color in late Fall. The yellow trees are from a house plant called dwarf cypress. The plant is bright green when healthy but turns golden yellow when it dies. My wife was upset when we lost the plant and set it in the garage for me to dispose of. After a couple of weeks of sitting there (sometimes I'm glad that I procrastinate) I noticed that the foliage turned a golden yellow color and I knew it would make nice material for a Fall tree. The spiky branches were gathered into a tree shape and wrapped with florist tape at the base. Some yellow ground foam was sprinkled over it and was held nicely by the spiky branches. The large tree on the right was also made by gathering sedum plant stalks and taping them again with florist tape into a tree shape. The tree was then covered with the reddish brown fiber foliage material. Woodland Scenics green clump foliage material was used to make the short evergreens and low ground cover. The floor of the forest was covered with ground up oak leaves that were processed in a blender.
This photo shows a close up of the finished weather track. It clearly shows the variations in the ties that were being painted in the previous post, and the use of powdered weathering material to create the rusty appearance on the rails and tie plates. This is the process that Mike Confalone uses in his "Scenery Outside the Box" DVD series available from Model Railroad Hobbyist's on-line store: http://store.mrhmag.com/index.html I highly recommend it.
Thursday, April 9, 2015
More Work on the South End
Since my last post I painted the curved backdrop corner, completed the Chapel Lumber Spur and finished the ground contours in this area. Before I place the ground cover, the next step is to paint the track and weather the ties before spreading the ballast. This is a time consuming process but well worth the effort.
My trackwork is a combination of flex-track and hand laid turnouts on pre-stained wood ties. The turnouts look great as built and could be considered finished, but they join section of flex-track that look like, well "flex-track." I could have just painted and weathered the flex track, but since I want it to all look homogeneous, I decided to weather it so that it looks like it's all part of the same track structure.
For track weathering I once again turned to the scenery Guru, Mike Confalone, whose process is quite realistic. Mike spray paints all of his trackwork with a base coat of dark brown paint. He uses Krylon brown Camouflage paint applied from a spray can. That makes easy work of covering a lot of track very quickly. For me, I used the same principle only I use thinned brown acrylic paint that I applied with my airbrush simply to avoid the paint fumes. Same result, different method.
Next I used Mike's process of weathering individual ties using diluted washes of lighter colored acrylic paints. This is a very effective means of making plastic ties look like the real deal. The above photograph shows some of the flex-track ties weathered in this manner. The results are instantaneous and will look even better once the ballast is applied and the rail is weathered with weathering powders.
As I mentioned above, the individual ties are painted in a random manner with varying shades of gray and yellow washes of acrylic paint. There is no right or wrong here as long as you maintain the randomness of painting the ties varying shades of the base colors. I use a piece of card stock as a pallet and mix shades of colors together and add some water to the brush to make a thin wash. Occasionally, I'll paint a tie a dark gray color to represent a new tie. The first 3 tracks in the photo have had their ties weathered and it's starting to look like a yard ladder.
I also started building the structure that makes up Chapel Lumber Yard. It will be a series of buildings featuring two connected warehouses adjoining an office/showroom building. My version is more representational than accurate, but should help capture the feel of the original structure.
Subscribe to:
Posts (Atom)